How to Finish Cedar Adirondack Chairs
Adirondack chair is not any less popular than the Adirondack mountains. Especially if you are into classics, having an Adirondack chair becomes an undeclared norm.
As a proud owner of an Adirondack chair, we are sure you are also careful when it comes to its maintenance and beautification. And the finishing is one of the essential parts of it. Yeah, we know you are here to learn how to finish cedar Adirondack chairs.
Before we get into the details, here are a few highlights. First, use a clean paintbrush to remove the wood dust and repaint as you like, “Wait a minute, is it that easy?” Well, let’s continue reading to find out.
Care and Maintenance Tips for Your Adirondack Chairs
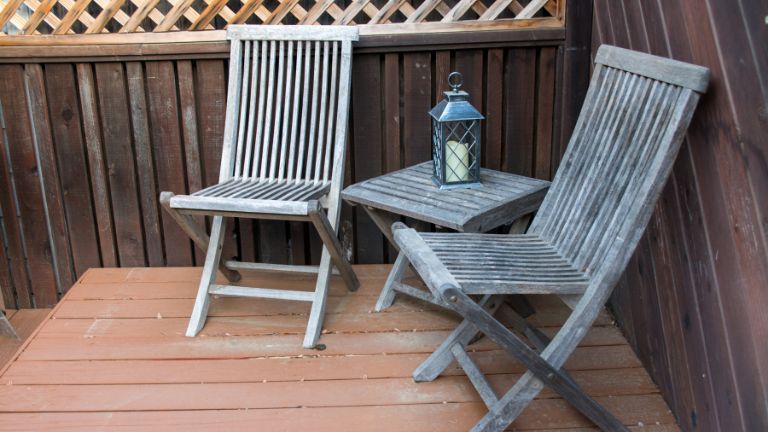
Many Adirondack furniture owners out there decide to leave their furniture unstained. In the beginning, it may give your furniture an aesthetic, raw impression & more golden appearance. However, over time, the unstained, untreated wood will lose its natural color and its nice shine.
If you want to keep the wood smooth, lightly sand the wood using the 120gt sandpaper. If you don’t want your Adirondack chair to turn grey but like to keep the natural look of the wood, you have to apply a nice finish on it, giving the chair more excellent UV protection.
It will work as an invisible umbrella to protect your outdoor furniture from direct sunlight. Your outdoor furniture will gain weather resistance ability.
Here we have explained the most popular ways of giving outdoor furniture a professional finish. Let’s take a look:
How to Finish Cedar Adirondack Chairs?
Stain is the most widely practised finishing method of wooden furniture. The stain is the way to go if you have been looking for a durable finish. A good stain would most likely last around 2-6 years. It solely depends on the quality, the number of coats used, and the type of furniture.
Satin will not bring peel or bubble, creating hours to remove from the wood when needed and eventually fading over time.
After staining, your furniture will look new for a long time compared to the paint. All you got to do is apply a single coat each spring or re-install it entirely every 5-6 years, as required.
When refinishing or touch-ups, you can get oil-based stains like ProLuxe or any similar oil-based stain. Before purchasing any oil-based stain, ensure it has a high UV protection rating.
You can look up online and compare UV ratings between different stains from different brands. A stain with a high UV rating will last for a long time.
Here we have the basic instructions to stain your Adirondack chair. Please note that these are basic instructions, so they may vary depending on the stain you purchase. We advise you to follow the paint manufacturer’s instructions to get the perfect match for your furniture.
Preparation Before You Begin the Stain
- We would highly recommend you stain prior before you entirely assemble the furniture.
- If you have already assembled the furniture, you need to disassemble it partially.
- There’s no need to take off the seat slats or back slats. The most important thing here is ensuring each piece is easily accessible for staining.
- Time to screw up the bottom foot plate and sand away all the scratches, dents, or flaws using 120-grit sandpaper. Make sure the legs are attached to the seats before that. Smoothen any rough spots you find.
- Find any dirt or dust and vacuum off. After that, wipe those using a damp cloth. You can also tack cloth to make sure there is no dust remaining.
- You may also use a brush, cloth, or sprayer to stain. However, remember that spraying might cause overspray. And if you are caught up on a windy day, your neighbor’s car, house, or dogs might also get free staining.
Applying the First Coat
- Use an outdoor oil-based stain with a sponge applicator or brush, and take care of each piece lightly.
- Look out for drips; if you find any, smooth them before the stain dries. Go for one section simultaneously to avoid inconsistency and ensure a no-drip finish.
- Let your outdoor cedar furniture dry out, all in a place with good ventilation. Don’t stain products indoors. Make sure it’s not your home, as breathing fumes can cause harm.
Applying the Second Coat
- When the first coat of stain becomes completely dry, you must lightly sand using 220 grit sandpaper. Let’s not forget you must clean the dust and dirt first.
- Go for applying the second coat following the same method as the previous coat. Remember, the second coat should be lighter. Don’t forget to watch out for any drips and clean them off if required.
- Leave the Adirondack in a well-ventilated outdoor spot to let it completely dry.
Applying the Third Coat
- As always, clean off the dirt and dust using a vacuum or wiper. This time get 320-grit sandpaper and lightly sand the wood.
- Now apply the third coat following the same method as the first two coats. Remember to keep the coat light. Look out for the drips and clean off as needed.
- Let the furniture completely dry. It will take around 24-48 hours in a well-ventilated outdoor place.
If you find out that your Adirondack chair lacks a rich finish for your requirement, even after applying three coats, you can apply one or two more coats, which will give you a better protective layer.
A clear coat would be acceptable to protect your furniture from the weather. Here’s a great tutorial by Kristopher Ulrich on how to quickly finish your cedar Adirondack chair:
How to Paint an Adirondack Chair
Stains provide your furniture with more durability than painting. However, the process of staining is entirely stressful.
We would not recommend you paint the Adirondack chair instead of stain, but if you are not up for the hard work, painting isn’t that bad. Although, the stain will minimize future labor.
The coat of paint may last up to 1-3 years, depending on its quality, maintenance, and type of wood. The first challenge for you here is finding good quality outdoor paint with a high UV rating.
It would be easier to paint if you could completely dismantle all the Adirondack chair parts first and get flat surfaces.
The Preparation
- When painting the Adirondack chairs, ensure the furniture is not fully assembled.
- If you have already assembled your furniture, try partially disassembling the furniture.
- There’s no need to take off the seat slats or back slats. The most important thing here is ensuring each piece is easily accessible for staining.
- Like you have prepared the Adirondack Chairs for staining, find any dirt or dust, and vacuum off. After that, wipe those using a damp cloth. You can also tack cloth to make sure there is no dust remaining.
- Here’s a pro tip: if you can find an exceptionally smooth surface, your painting process will become two times easier as you can access every inch of the wood freely.
Apply the First Coat of Painting
- If you apply the paint using a brush, then go for a liberal coat of paint. Watch out for drips, and as instructed before, get rid of them. Apply the paint only one section at a time.
- Leave the Adirondack chairs out for a while in a well-ventilated outdoor spot to let them completely dry.
Apply the second Coat of Painting
- Once the first coat is dry, start with the front legs and lightly sand using 220-grit sandpaper. Let’s not forget you must clean the dust and dirt first.
- Apply the second coat following the same method as the previous coat. Remember to keep the coat light. Look out for the drips and clean off as needed.
- Keep the Adirondack chairs outside to dry out in a place with good ventilation.
Solid color stains or paints will last longer than others. Remember, how heavy a finish is does not determine its longevity. It’s more about how you applied it and your area’s weather conditions.
FAQs
- What Is the Best Wood for an Adirondack Chair?
Pressure-treated pine wood is quite popular out there for making Adirondack chairs. However, African Mahogany is the best and most lucrative one. It provides excellent durability and also looks posh!
- What Else Can I Do to Give My Adirondack Chair an Excellent Finish?
You can try applying raw linseed oil coats on the wood. It will give your chairs a great finishing look. Remember, it may take around 2-8 weeks to dry.
- Is Stain Better than Paint on the Adirondack Chair?
Staining the Adirondack chair is a lot better than paint. Over time paint build-up is likely to increase the tightness of your furniture wood and give them a lousy appearance. On the other hand, wood stain makes your furniture look nice and provides excellent durability.
Final Verdict
No matter how good quality paint you apply on the Adirondack chair, it will eventually peel off over time. Stain provides your furniture with a nice finishing touch. Also, they are easy to maintain. Furniture stain is the best finishing method for your patio furniture or any outdoor cedar.
We hope now you clearly understand how to finish cedar Adirondack chairs. Good luck with your next project.


